What Happens During a Roof Inspection?
The roof inspection process follows a structured evaluation that we use to review exterior materials, flashing, drainage systems, attic conditions, and ventilation. We look for wear, storm damage, and hidden moisture concerns. By understanding what happens during a roof inspection, we set clear expectations, prepare properly, and use the findings to guide smart repair, maintenance, or replacement decisions here in Idaho.
Key Takeaways
- We complete a detailed exterior review of shingles, flashing, gutters, penetrations, and any signs of storm-related damage.
- We evaluate the attic and interior areas to identify hidden leaks, ventilation imbalances, condensation, and insulation issues.
- We document all findings with photos and written summaries, clearly separating urgent repairs from routine maintenance and long-term items.
- We base recommendations on roof age, damage severity, decking condition, leak history, and recent storm performance.
- We improve safety and efficiency by clearing access points and noting recent concerns before the inspection begins, which also strengthens communication throughout the process.
What Triggers a Roof Inspection and What Homeowners Can Expect
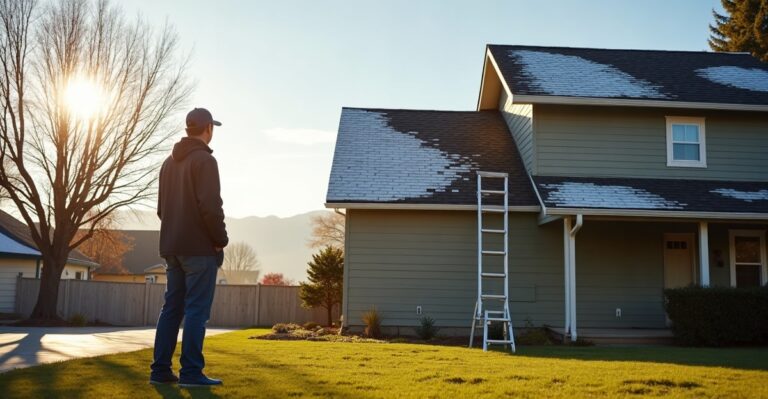
Homeowners across southwestern Idaho schedule roof inspections for practical reasons. Aging shingles, active leaks, storm damage, wind exposure, snow load, and seasonal temperature swings all put pressure on roofing systems in Boise, Meridian, Eagle, Kuna, Nampa, Caldwell, Middleton, Mountain Home, McCall, and nearby communities.
Many inspections start with visible warning signs. Curling shingles, missing tabs, or water stains on ceilings often align with common issues outlined in common roof problems in Idaho homes. In other cases, homeowners simply want to understand their roof’s condition before listing a property for sale or planning long-term improvements.
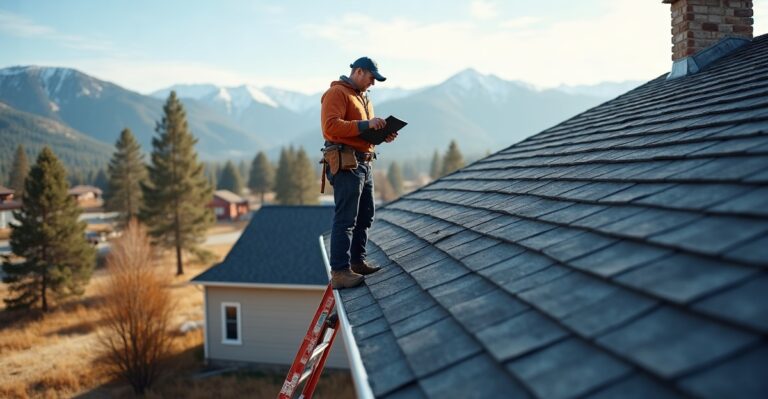
The roof inspection process is primarily informational. We use it to evaluate the current condition of the system and explain what we see. Homeowners can also use this stage to evaluate contractor professionalism, communication style, and transparency before committing to any repair or replacement work.
A typical inspection takes 45 minutes to a few hours. Time depends on roof size, slope, material type, and overall complexity. Steeper roofs or multi-level layouts require additional safety setup and careful movement.
Homeowners don’t always need to be present, but availability helps. We often review findings in person and answer questions right away. Basic access is important. We need clear driveway space for our vehicle and ladder placement. Attic access may be required, so stored items should be moved away from entry points. Pets should be secured for everyone’s safety.
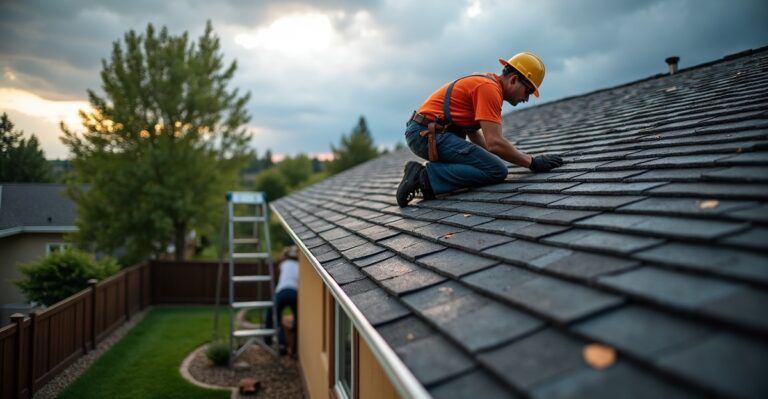
Safety is a priority throughout the roofing inspection steps. We stabilize ladders properly, use appropriate fall protection, and move carefully to avoid unnecessary stress on roofing materials. An inspection should never create new damage.
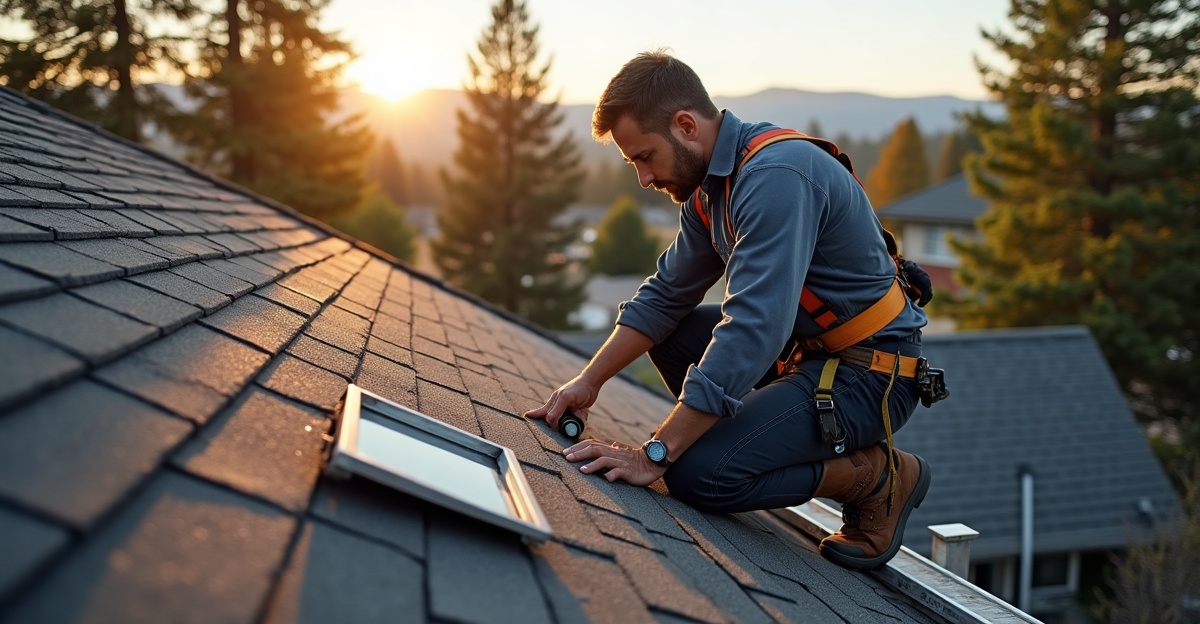
Exterior Roofing Inspection: Evaluating the Most Visible and Vulnerable Areas
The exterior review forms a major part of the roof inspection process. We examine the entire surface to assess current wear and identify active or developing problems.
Shingles, Flashing, and Surface Components
We start with the primary roofing material. For asphalt shingles, we look for missing, cracked, curling, or blistering shingles, along with granule loss and exposed fiberglass matting. Metal, tile, or other materials have their own wear patterns, and we adjust our roofing inspection steps accordingly.
Flashing receives close attention. We check around chimneys, skylights, roof-to-wall transitions, and plumbing vents for gaps, corrosion, lifting edges, or failed sealant. Many persistent leaks trace back to flashing breakdown rather than field shingles.
We also inspect:
- Gutters and downspouts for proper drainage and signs of water backup
- Roof penetrations and exposed fasteners
- Sealant joints around vents and fixtures
- Ridge caps and hip areas for wind-related separation
Storm damage is another key concern. In parts of Idaho with higher wind exposure, we often find lifted shingles or creased tabs. Hail can cause localized bruising that shortens roof lifespan even if leaks haven’t started yet.
Regional conditions matter. Snow load can stress weaker decking sections and create low spots that trap moisture. Ice dam risk typically appears along eaves where insulation and ventilation are unbalanced. If we suspect deeper damage or recurring leaks, we may recommend further evaluation based on guidance similar to how to find a roof leak before it gets worse.
This exterior phase prevents hidden moisture intrusion from progressing into structural issues. Small details on the surface often signal larger underlying concerns.
Interior and Attic Evaluation: Detecting Hidden Leaks and Ventilation Problems
Exterior materials tell only part of the story. A professional roof inspection guide always includes attic and interior evaluation when access is available.
We begin by examining the underside of the roof decking. Water stains, darkened wood, damp insulation, and musty smells often indicate past or active leaks. In colder Idaho months, condensation can form due to poor ventilation and temperature differences between the attic and living space.
Proper airflow is essential. We review intake vents at the eaves and exhaust vents near the ridge to confirm balanced ventilation. Blocked soffits, compressed insulation, or insufficient exhaust can trap heat and moisture. Over time, that environment weakens decking and shortens shingle life.
Leak tracing is sometimes required. Interior stains don’t always align directly above the exterior entry point. Water can travel along rafters or decking before dripping onto insulation or drywall. Part of our roofing inspection steps involves connecting those interior signs with specific exterior flashing or shingle issues.
Hidden damage is common in roofs that appear acceptable from the ground. Idaho’s seasonal temperature swings—hot, dry summers and cold winters—accelerate expansion and contraction of roofing materials. That movement can loosen fasteners and open small pathways for moisture.
Attic evaluation often determines whether a minor repair will solve the issue or if broader system improvements are needed.
Documenting the Findings: Photos, Notes, and Clear Explanations
A thorough roof inspection process includes clear documentation. We take photos of key areas, especially where wear, storm impact, or workmanship concerns are visible. Visual evidence helps homeowners understand exactly what we’re referencing.
Written summaries outline overall roof condition, estimated age range when possible, and areas of concern. We separate immediate repair items from general maintenance and long-term considerations. That distinction prevents confusion and sets realistic expectations.
Clear communication matters. We avoid vague statements like “the roof looks bad” or unsupported claims about remaining lifespan. Instead, we explain conditions in practical terms. For example, widespread granule loss and brittle shingles may align with warning signs outlined in signs you need a roof replacement.
When storm damage is present, documentation may support an insurance discussion. While we can’t guarantee claim approval, organized photos and written details provide a structured starting point.
Transparency builds trust. Homeowners deserve straightforward information without exaggeration or pressure.
Repair, Maintenance, or Replacement: How Recommendations Are Made
Inspection findings guide next steps. Some roofs need only minor repairs. Others require targeted maintenance, such as resealing flashing or improving ventilation. In more advanced cases, full replacement becomes the responsible option.
We consider several factors during this phase of the roof inspection process:
- Overall roof age
- Extent and distribution of damage
- Condition of underlying decking
- History of recurring leaks
- Performance under recent storms
Older roofs with widespread wear often prompt conversations similar to those explained in roof repair vs replacement. If replacement is appropriate, we may discuss a full roof tear-off to evaluate decking and ensure proper installation from the base up.
For isolated issues, we typically recommend focused roof repair services instead of unnecessary replacement. Our role is to provide honest guidance. We don’t guarantee pricing, timelines, or future lifespan because each roof’s condition is unique.
Homeowners can use inspection reports to compare contractors. Clear explanations, safety practices, and organized documentation reflect professionalism. Consistency in these roofing inspection steps often indicates how the rest of the project will be handled.
How to Prepare for a Roof Inspection: A Simple Homeowner Checklist
Preparation helps the process move smoothly. A few simple steps improve efficiency and safety.
Before we arrive, it helps to:
- Clear driveway space for ladder setup
- Trim back obstacles near the roof perimeter
- Provide attic access and move stored items
- Secure pets
- Note recent leaks, musty odors, or storm events
Sharing specific observations allows us to tailor the roofing inspection steps to known problem areas. If a recent windstorm caused visible shingle movement, that information narrows our focus.
For homeowners who want a broader understanding of roofing systems and local conditions, our roofing blog provides additional education on maintenance and lifespan considerations, including how long a roof lasts in Idaho weather.
A clear professional roof inspection guide follows a logical sequence: preparation, exterior inspection, interior and attic evaluation, documentation, and final recommendations. Each stage builds on the previous one.
The goal is simple. We reduce uncertainty, protect the structure, and support informed decisions. Careful evaluation today often prevents larger structural repairs tomorrow.